How To Add Your Own Media: Images, Pictures, Videos or Documents
Adding Your Own Images or Videos
- Name your image or video appropriately.
- Name should be descriptive for better accessibility
- Avoid years or other dates if possible.
- Remove any extra text like "draft" or "final" or "(1)" etc.
- Images should be cropped to specific sizes to be used in certain areas for the best visual results on your website (banners, card images, spotlights, etc.)
View our Naming Convention page for more details about dimensions and suggested prefixes. Dimensions can also be seen if you click the ? next to the image field.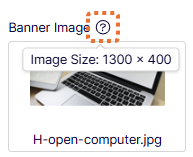
Images used within text blocks or "body" fields do not have to be a specific size, however, the maximum size shouldn't be over 1200 pixels (width or height). File sizes should be under 1M (megabyte). - Open your Assets pane on the right.
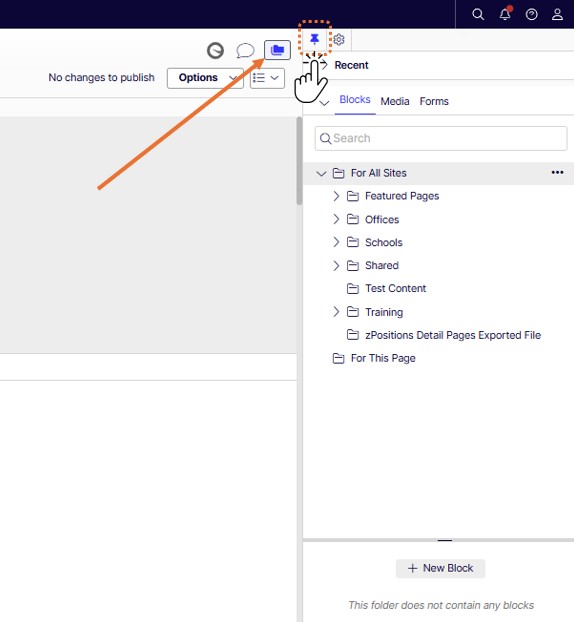
- Select the Media tab
- Browse to your school or office Images folder and select it
- Left click and drag your file to the "drop zone" in the lower right corner or go to next step to use "upload" options.
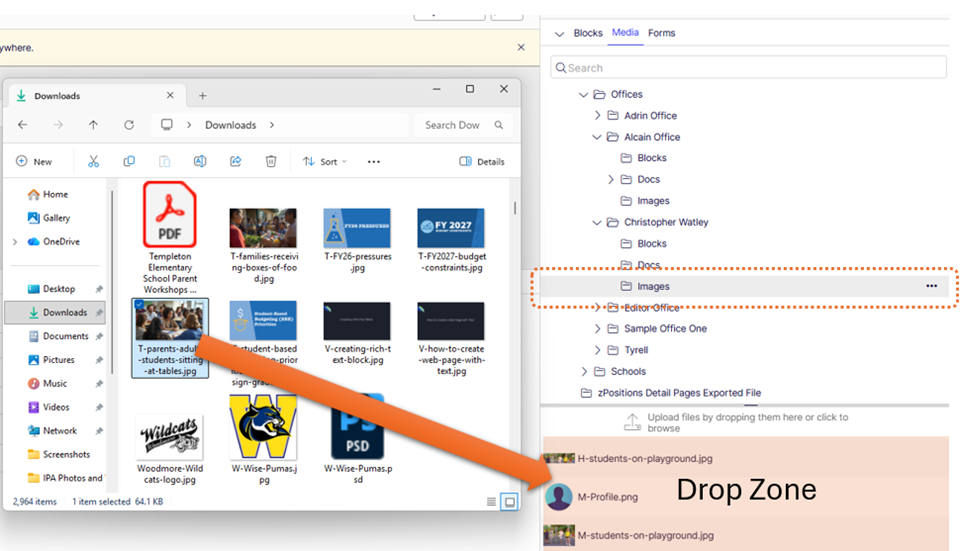
- Use the Options menu and select Upload, the Upload files button or + button to open a browsing window
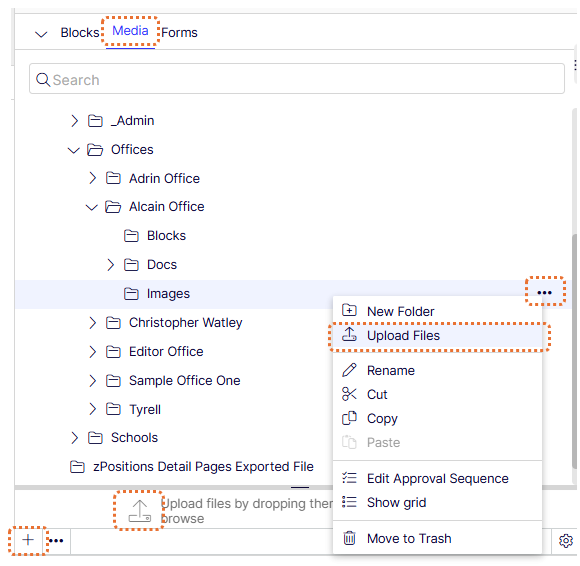
- Click on the + sign to browse to the image(s) or vidoes on your computer
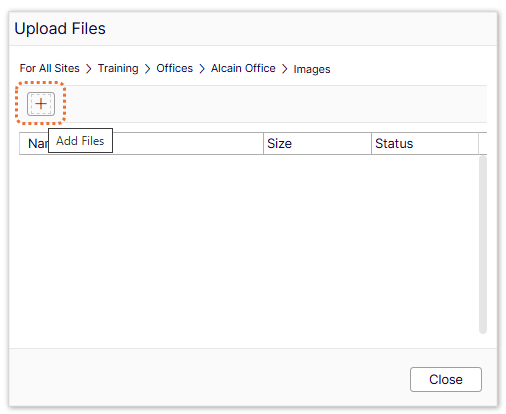
- Select the file(s) and click Open
- Publish any uploaded files.
How to Use the Optimizely Project Overview to Publish Page Assets Including Images
 Description:
There are different ways to publish content in Optimizely. One of the most efficient ways is to use the Project Overview. The Project Overview allows you to select as many items as you want and publish them all at once. It is also the best area to check for items you may have missed if you were publishing content as you were working. We recommend always checking the Project Overview before you are done editing.
- Add the files to your block or page.
- Publish any pages or blocks that have been edited.
Adding Your Own Documents (pdf, doc, PPTs, etc.)
- Name your document appropriately
- Name should be descriptive for better accessibility
- Avoid years or other dates if possible.
- Remove any extra text like "draft" or "final" or "(1)" etc.
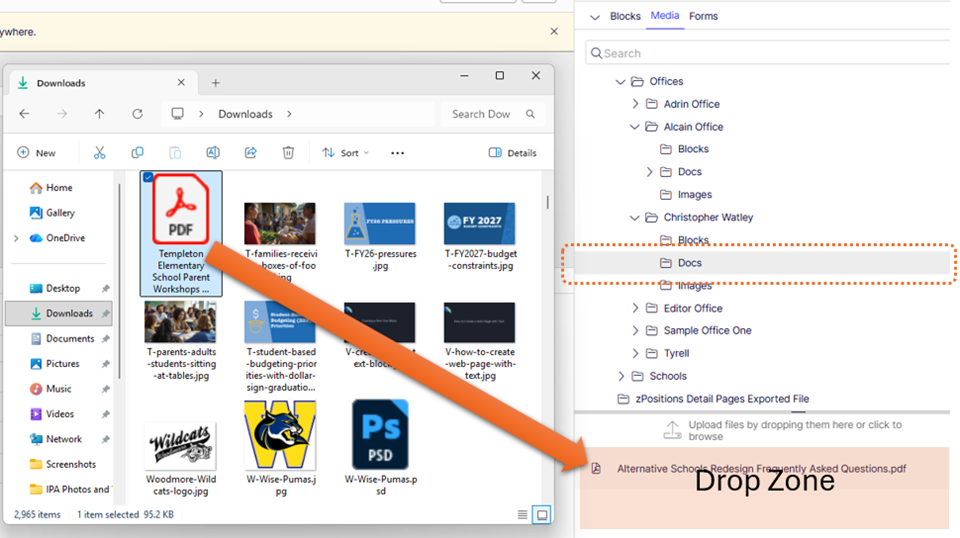
- Open your Assets pane on the right.
- Select the Media tab
- Browse to your school or office Docs folder and select it
- Left click and drag your file to the "drop zone" in the lower right corner or go to next step to use "upload" options.
- Use the Options menu and select Upload, the Upload files button or + button to open a browsing window
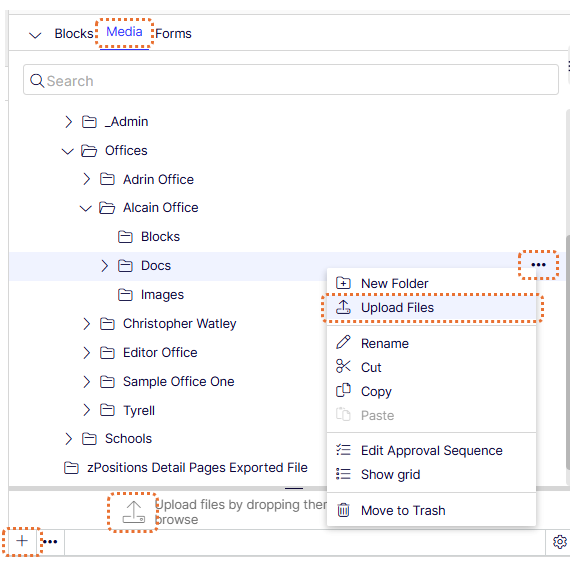
- Select the file(s) and click Open
- Publish any uploaded files.
How to Use the Optimizely Project Overview to Publish Page Assets Including Images
Description:There are different ways to publish content in Optimizely. One of the most efficient ways is to use the Project Overview. The Project Overview allows you to select as many items as you want and publish them all at once. It is also the best area to check for items you may have missed if you were publishing content as you were working. We recommend always checking the Project Overview before you are done editing.
- Add the files to your block or page.*
- Publish any pages or blocks that have been edited.
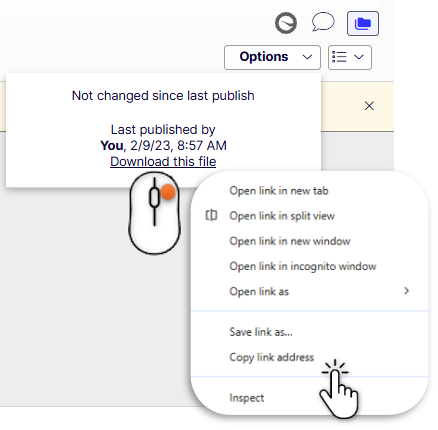
- *If you need the link for the file:
- Open the file by double clicking it or selecting Edit or View from the Options context menu
- Click on the Options button at the top, right click on the "Download this file" link and select "Copy link address".